User Guide
—— Intro
Account creation
How to create an account
Account email verification
Login
Forgotten password
Manage Buildings
Adding a Building
Adding Units to a building
Edit a Unit
Add Unit Type
How to Customize Unit Numbering
Manage Leases
Leases
Set Lease Details
Create a Lease
Add Guarantors
Lease for multiple occupants
Tenant List
Tenant List Color-Coding
Lease Expiration Days
Lease Summary
Close/Terminate a Lease
Renew a Lease
Renew a Lease with PRICE change
Archive
Tenant Screening
Report Tenant (good or bad)
View Tenants
Real Estate Agent
Manage Landlords
Add a Landlord
Pay Landlord
Manage Credit
View Credit
Money
Manage Money
Add Payment
View Receipts
Ledger
Add Bank Account
Manage Ledger
View Ledger Entries
Reports
Manage Users
Users
Add sub-Account
User Activity
Maintenance
Maintenance
Add Contractor
Add Contractor Quotations
View Contractor Quotations
This guide is work in progress. So specific details may change in future versions.
This software platform helps streamline the day-to-day management of real estate properties. It helps keep track of tenants, leases, rent payments, contractors, schedules, office ledger, etc. It can be used by landlords, and real estate companies.
Note:
- While training with this guide, wherever you see this icon
 , you can click on it to get more info in context.
- You may test this website on the Demo site. However, anything you enter on the demo site may be wiped at anytime. So do not rely on it.
- Also, the demo site may lag behind the main site in features, and in bug fixes.
- After you have practiced and become comfortable on the demo, you can then create your real account on the Main site.
- Please inform us of any errors you encounter on the demo site.
- Your suggestions are welcome for continued improvement, and development.
When you are on the Demo site, you will see this red alert,

How to create an account
Every user must create an account for managing one or more properties.
Open the main page.
Click Create Account.
Fill in the form by entering your personal details.
See example below.
Enter a strong password that cannot be easily guessed.
Under Role: select a category that fits your situation.
A role of "Real Estate Agent" has extra features, for managing multiple landlords.
When you have filled in all the details, click Create Account.
Account email verification
Once you create your account, a verification email would be sent to your email address.
You must click the verification link before your account can be activated.
Open the email, and click the verification link provided to verify your account.
Note: Sometimes the email may end up in the Spam Folder.
Login
Go to the main page.
Click Sign-in.
Enter your email.
Enter your password.
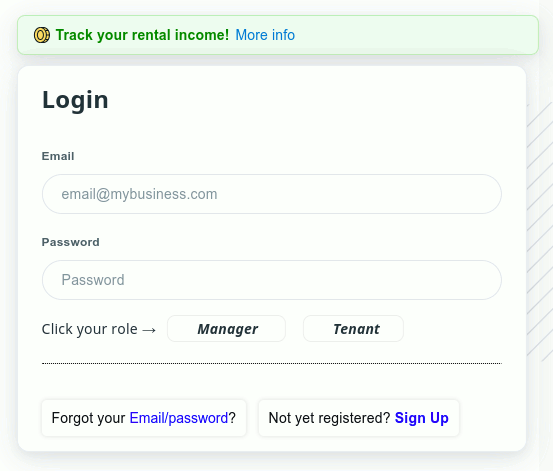
Click the login button.
Forgotten Password
If you cannot remember your login information (password, or the email address),
You can access your account as follows...
Go to the main page.
Click Sign-in.
Click Forgot your Email/password?.
You will need either your phone number, or email address to continue.
Adding a Building

Note: A building contains one or more units (flats, shops, offices, etc).
So even if you are managing one flat, you still need to add the building first, before you can add the flat.
To add a Building, go to the Admin page.
Under Buildings, click Add a New Building.
Fill the form and submit.
On the Menu, click Tenant List to see the building you added.
To add another Building, follow the same steps above.
Buildings are managed independent of each other.
Adding Units to a building

In the process of adding a Building, you were asked how many units the building has.
So, those units would already have been added.
A unit can be a Flat, shop, office, etc.
On the Menu, click Tenant List to see the units.
To add more units inside a building, go to the Admin page.
Under Flats/Apartments, click Add Unit.
Edit a Unit
This allows you to modify the details of a Unit in a building.
Go to the Admin page.
Under Flats/Apartments, click Edit Unit.
Add Unit Type
This feature allows you to add a new unit type.
A unit type can be a Flat, shop, office, warehouse, etc.
Go to the Admin page.
Under Flats/Apartments, click Add Unit Type.
Leases

This is where you manage tenants' length of stay.
When a tenant is to be entered into the system, you create a new lease for that tenant.
When an existing lease expires, you can either Renew, or Terminate the lease.
Set Lease Details
Before you can create a lease, you must first set some details about the unit, such as rent amount.
Go to the Admin page.
Under Leases, click Set Lease Details.
How to Customize Unit Numbering
By default, unit numbers are numeric: 1,2,3,4,5,...
You are able to give each unit custom numbering. For example, 12F for room F on the 12th floor.
Go to the Admin page.
Under Flats/Apartments, click Set Rent Amount.
Create a Lease
After a potential tenant has paid rent and other fees, you create a lease before the tenant moves in.
Note: The tenant's ID card/driver's license number is required.
Go to the Admin page.
Under Leases, click Create.
Fill the form completely.
Click the submit button.
After you have created the lease, click on Tenant List from the menu.
Add Guarantors
After a lease is created, you can add Guarantors, as well as details about the old landlord.
Go to the Admin page.
Under Leases, click Add Guarantor.
Lease for multiple occupants
A unit can accommodate more than one tenant, who share the rent.
When that happens, you create a lease for the first tenant.
Then you repeat the same process, and create a lease for the next tenant in the same unit.
Repeat for other tenants sharing the same unit.
This is the only way to collect the full details (ID, phone, email, ...) of each tenant.
Tenant List
The tenants list page displays your buildings, and the status of each unit within it.
The image above is an example of a tenant list for a building called Citec Estate.
Each unit is color coded according to its status. Use the top-right Legend to know what each color signifies.
To the right of each unit are three icons.
The first icon to the left is the notes icon.
Blue icon  means notes available, and gray icon
  means notes not available.
The next icon in the middle  is the payment history icon.
Click it to see payments for that unit.
is the payment history icon.
Click it to see payments for that unit.
Clicking on the icon also shows receipts and other lease documents.
The rightmost icon shows the status of the lease.
It can be one of four icons, which show whether the unit is vacant  , active lease
  , lease nearing expiration
  , or expired lease
  .
.
The top-right Legend shows what each icon signifies.
Tenant List Color-Coding
Each unit is color-coded. This makes it easy to look at a building and know the status at a glance.
Deep red: unit is occupied, but the lease has expired.
Light red: the unit is vacant.
Yellow: there is a balance to be paid by tenant.
Green: rent has been paid in full. Nothing is owed.
Lease Expiration Days
As expiration draws near for a lease, a number appears for days before expiration.
After expiration, a negative number appears, showing days since the lease expired.
In the example above,
- Unit #5 has 31 days before the lease expires.
- Unit #6 has already expired 7 days ago.
Lease Summary
To view a summary of leases,
Go to the Admin page.
Under Leases, click View.
Select Building to view leases. Days left on lease are displayed.
Days shown in red are expired leases, showing days since expiration.
Click on a name to see more detail about the lease.
Close/Terminate a Lease
When a lease expires, you can either Close/Terminate it, or Renew it.
After a lease is closed in the system, the unit would become vacant.
To Terminate a lease, go to the Admin page.
Under Leases, click Close/Cancel.
Select the Building, and then select the unit.
Check the accuracy of the details on the page.
Note: Before you click the TERMINATE button, make sure all details are correct.
CAUTION: This step cannot be reversed.
Click the TERMINATE button.
Renew a Lease
When a lease expires, you can either Close it, or Renew it.
After a lease is renewed, the old lease is archived for future reference.
To Renew a lease, go to the Admin page.
Under Leases, click Renew.
Check the details on the page.
Note: Before you click the RENEW button, make sure all details are correct.
CAUTION: This step cannot be reversed.
Click the RENEW button.
Renew a Lease with PRICE change
Once a lease has been created, the rent amount can no longer be changed.
That means when you try to renew the lease, the old rent would still be on it.
To Renew a lease and change the rent amount, go to the Admin page.
Under Leases, click Renew.
A price field is presented that allows you to enter a different rent amount,

Check the details on the page.
Note: Before you click the RENEW button, make sure all details are correct.
CAUTION: This step cannot be reversed.
Click the RENEW button.
Archives
Historical account of leases and uncollected debt for each unit.
Tenants

This is where you screen prospective tenant, upload records for existing tenant, view tenant data, etc.
Tenant Screening
How can you tell if the person you're about to rent to will be a good or bad tenant?
You can tell by knowing the person's past history as a tenant to other landlords.
This screening feature lets a landlord or real estate agent access a tenant's past rental records (good or bad).
You also report information about your own tenants, that other landlords can use as referrence. This is landlords helping one another identify good and bad tenants.
Assuming tenant moves out of your property without paying his outstanding balance. You would upload this information here.
When that tenant then goes to another landlord to try to rent a place, that landlord would pull up the tenant's records to see that he owed the last landlord.
Conversely, if you had a good tenant, who paid his rent on time, not a nuisance to others, and didn't damage your property, you would upload that tenant's info also. The next landlord that pulls up his info, would know that this is a good tenant.
When tenants know that bad behaviour will become a part of their permanent rental history, this would force them to prioritize rent payment, and be of good behaviour when renting from you.
Report Tenant (good or bad)
Besides screening prospective tenants, you should also report info about all your tenants.
Tenant reporting has mutual benefit for all landlords, and helps create honest tenants who pay on time.
Go to the Admin page.
Under Tenants, click Tenant Screening.

Click Upload Tenant History, as shown above.
Fill out and submit the form.
View Tenant
Full details about a tenant, including contact info, lease details, payments, etc.
Manage Landlords

This is a feature for Real Estate Agents, for managing the landlords in their portfolio.
When adding a landlord, you also select Buildings owned by the landlord.
Rent amounts collected, can be paid to a landlord. This helps keep track of payments to that landlord.
Add a Landlord
Go to the Admin page.
Under REA landlords, click Add a Landlord.
Fill out and submit the form.
Pay Landlord
This feature helps document payments from Real Estate Agent to a landlord.
Go to the Admin page.
Under REA landlords, click Pay Landlord.
- Select a landlord from the list.
- Buildings belonging to that landlord would be displayed.
- Total amount collected for each building would be shown beside it.
- Click Detail, to see the payments by each unit.
- Enter Management fee to see the amount due the landlord.
Fill out and submit the form.
Manage Credit
Sometimes a landlord sends money to the Real Estate Agent.
Such money can be for maintenance, purchases, bill payment, etc.
This feature is where Real Estate Agent enters money received or spent into the system.
Go to the Admin page.
Under REA landlords, click Manage Credit.
The current balance would be displayed.
Fill out and submit the form.
View Credit
Sometimes a landlord sends money to the Real Estate Agent.
Such money can be for maintenance, purchases, etc.
This is where you view such amounts in the system.
Go to the Admin page.
Under REA landlords, click Manage Credit.
Click View Account.
Manage Money

For existing tenants, you are able to add payments. For your office, you can manage bank accounts.
You can also track office expenses, income, purchases, etc in a ledger.
Add Payment
Go to the Admin page.
Under Money, click Add Payment.
Fill the form.
Under Uploade Receipts, scan the receipts you gave to the tenant.
View Receipts
When a lease is created, a shot of any receipt issued to the tenant is uploaded.
Same story with when payment is added, and when a lease is renewed.
To view receipts
Go to the Main page, or click Tenant list.
Locate the building. Locate the unit.
Click on this icon .
Ledger
Every office has expenses to keep track of.
This ledger section is where office expenses are entered, for record keeping.
Note: The use of this ledger feature is optional. It is only provided for your convenience.
If you have a resident accountant, you can continue to manage expenses your usual way.
Add Bank Account
There is a ledger feature that allows you to keep track of your office expenses.
Both income, and expenses can be added.
Each ledger entry must be added to a bank account.
To add a bank account,
Go to the Admin page.
Under Money, click Add Bank Account.
Fill the form.
You can add as many bank accounts as you have.
Manage Ledger
This feature is for tracking all of your office expenses.
Note: this has nothing to do with tenants or rent collection. It is merely for tracking your business expenses.
You can use it to keep track of Payments received, as well as Expenses.
Cash flow can be tracked under as many bank accounts are you have.
FYI: Once an entry is made, it cannot be edited or removed. Corrections can only be made with more entries.
Go to the Admin page.
Under Money, click Manage Ledger.

Click either Deduct Money spent or Add Payment received.
Fill the form.
Note: If you do not see your bank account, you must first add the account, by going to
Admin page.
Under
Money, click
Add Bank Account.
View Ledger Entries
This is where you view all Payments and Expenses.
Go to the Admin page.
Under Money, click Manage Ledger.
Fill the form.
Reports
This is a breakdown of payments per unit, and the sum
Go to the Admin page.
Under Money, click Reports.
Users
You as the main account owner, may need assistants to help you manage your properties.
For this, you have the ability to create sub-users.
You delegate tasks to each sub-users.
You have full control over what a sub-user can see and do.
Add sub-Account
You can delegate tasks to other users that you create.
For example, let's say you manage fifty buildings in your portfolio, you can delegate five each to ten different users.
A user can only see the assets that you assign to him or her.
To add a sub-user,
Go to the Admin page.
Under Users, click Add sub-Account.
Note: A sub-user cannot create other users. Only the primary account owner has that ability.
User Activity
Key activities are logged, such as creating, terminating, renewing leases, or adding payments.
To view user activity,
Go to the Admin page.
Under Users, click User Activity.
Select a user.
Note: If you do not have Users section, speak to your Administrator.
Maintenance

One of the fundamental things about managing real estate is that you have to deal with contractors and vendors.
Contractors will provide you with quotations and cost estimates for different jobs that need to be performed.
This section is where you manage contractors and vendors.
You enter every quotation you receive from a contractor or vendor.
You can also upload files. For example, you can scan a quotation and upload it.
Add Contractor
Go to the Admin page.
Under Maintenance, click Add Contractor.
Add Contractor Quotations
Go to the Admin page.
Under Maintenance, click Contractor Quotations.
Click Add New Quotation.
Click on the name of the contractor or vendor.
Fill the form.
Decide if you want the quotation to be visible to your other sub-users.
If you do not want other users to see the quotation, choose not visible.
View Contractor Quotations
Go to the Admin page.
Under Maintenance, click Contractor Quotations.